The OS is the single most advanced and most efficient software that gets all the credit for making the computer hardware usable. The Operating System or OS is responsible for all the user friendliness of the computer. Operating Systems is the first actual software that you need to install on your computers to be able to use it, including smartphones. The functions of an OS include:
Memory management
Disk management
File management
Process management
Interrupts and Networking
The OS runs and makes it possible for the users to interact with the computer without any knowledge about the underlying hardware. The OS interacts with the hardware using firmwares and device drivers and the users can use the hardware using the interface of the OS, called the GUI or Graphical User Interface. A few features of modern operating systems are:
GUI
Multi-Threading
Multi-Processing
Multi-Tasking
Multi-User
All other softwares that we use to do our work whether for office work, playing games, movies, music, browsing the internet, etc require the OS to support them.
Examples of operating systems are Microsoft Windows XP, 7, 8, Mac OS X and Linux. A full list of operating systems may be found here.
Create A Hidden User Account This tweak allows an account that is normally displayed on the Welcome screen to be hidden from view. To log on using the account it's necessary to use the Log On To Windows dialog box similar to the one in Windows 2000. #[Start] [Run] [Regedit]#Registry Key:
HKEY_LOCAL_MACHINE\SOFTWARE\Microsoft\WindowsNT\CurrentVersion\Winlogon\SpecialAccounts\UserList#Modify/Create the Value Data Type(s) and Value Name(s) as detailed below.#Data Type: REG_DWORD [Dword Value] // Value Name: Type Name of Account to be Hidden#Setting for Value Data: [0 = Account is Hidden / 1 = Enabled]#Exit Registry and Reboot...
While the account is hidden on the Welcome screen, note that the account profile will be visible in C:\Documents and Settings or wherever user profiles are stored as well as in Local Users and Groups
Boot up with DOS and delete the sam.exe and sam.log files from Windows\system32\config in your hard drive. Now when you boot up in NT the password on your built-in administrator account which will be blank (i.e No password). This solution works only if your hard drive is FAT kind.
Method 2
Step 1.Put your hard disk of your computer in any other pc .Step 2.Boot that computer and use your hard disk as a secondary hard disk (D'nt boot as primary hard disk ).Step 3.Then open that drive in which the victim’s window(or your window) is installed.Step 4.Go to location windows->system32->configStep 5.And delete SAM.exe and SAM.log Step 6.Now remove hard disk and put in your computer. Step 7.And boot your computer .
Sometimes we delete the files permanently, and realize that deleting them is like a Blunder...
For all those folks,
Here is the solution
Software called "Kissass Undelete" , can bring those files from the hard disk or your flash drive.
Conditions : Only if the data on that drive is not re-occupied(or written). that means the space which was available after the deletion is not been occupied after the deletion.
Press Ctrl and click a link. Or click a link with your middle mouse button (or mousewheel).
Opens the link in a new tab in the background .
Press Ctrl+Shift and click a link. Or press Shift and click a link with your middle mouse button (or mousewheel).
Opens the link in a new tab and switches to the newly opened tab.
Press Shift and click a link.
Opens the link in a new window.
Ctrl+Shift+T
Reopens the last tab you've closed. Google Chrome remembers the last 10 tabs you've closed.
Drag a link to a tab.
Opens the link in the tab.
Drag a link to a blank area on the tab strip.
Opens the link in a new tab.
Drag a tab out of the tab strip.
Opens the tab in a new window.
Drag a tab out of the tab strip and into an existing window.
Opens the tab in the existing window.
Press Esc while dragging a tab.
Returns the tab to its original position.
Ctrl+1 through Ctrl+8
Switches to the tab at the specified position number on the tab strip.
Ctrl+9
Switches to the last tab.
Ctrl+Tab or Ctrl+PgDown
Switches to the next tab.
Ctrl+Shift+Tab or Ctrl+PgUp
Switches to the previous tab.
Alt+F4
Closes the current window.
Ctrl+W or Ctrl+F4
Closes the current tab or pop-up.
Click a tab with your middle mouse button (or mousewheel).
Closes the tab you clicked.
Right-click, or click and hold either the Back or Forward arrow in the browser toolbar.
Displays your browsing history in the tab.
Press Backspace, or Alt and the left arrow together.
Goes to the previous page in your browsing history for the tab.
Press Shift+Backspace, or Alt and the right arrow together.
Goes to the next page in your browsing history for the tab.
Press Ctrl and click either the Back arrow, Forward arrow, or Go button in the toolbar. Or click either button with your middle mouse button (or mousewheel).
Opens the button destination in a new tab in the background.
Opens the Tools menu, which lets you customize and control Google Chrome.
Alt+E
Opens the Page menu, which lets you control the page you're viewing.
Ctrl+B
Toggles the bookmarks bar on and off.
Ctrl+Shift+B
Opens the Bookmark manager.
Ctrl+H
Opens the History page.
Ctrl+J
Opens the Downloads page.
Shift+Esc
Opens the Task Manager.
Shift+Alt+T
Sets the focus on the browser toolbar. Use right and left arrows on the keyboard to navigate to different buttons on the toolbar. Press Shift+F10 to bring up any associated context menu (e.g. browsing history for the Back button). Press Escape to move the focus back to the page.
Ctrl+Shift+J
Opens Developer Tools.
Ctrl+Shift+Delete
Opens the Clear Browsing Data dialog.
F1
Opens the Help Center in a new tab (our favorite).
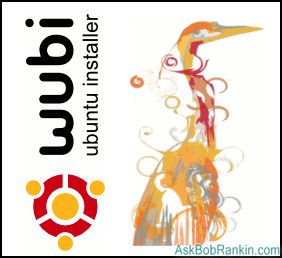
If you want to install ubuntu 7.04 Feisty, but you don’t want to modify your Windows partition and you want to install it inside, Wubi is for you. According to its website:
Moreover, Wubi doesn’t need you to replace the default Windows bootloader, as “Wubi adds an entry to the Windows boot menu which allows you to run Linux. Ubuntu is installed within a file in the windows file system (c:\wubi\disks\system.virtual.disk), this file is seen by Linux as a real hard disk.” Then it loads the file as a loopback root Filesystem, kind like those described in “The Loopback Root Filesystem HOWTO,” but with the loopback filesystem is actually in Windows’s partition.
Since Wubi makes Ubuntu run inside Windows partition, there will be a little bit performance penalty, especially when your Windows partition is fragmented. Moreover, if there were any error in the ntfs partition that affects the system virtual disk, you need to fix the errors with something like chkdsk in Windows first before booting Ubuntu. If you’re not afraid of partitioning, I still recommend you to install Ubuntu in a separate partition.
Administrator password can be broken by replacing sam file in system32\config by the sam file in repair folder of windows. it can be easily done on a machine with dual operating systems, simply log on to os other then the one whoes password is to be cracked the way is exactly same as written above but if there is a single os on a machine then there is only one way i.e to use ms dos start up disk or some other boot disk and replace the sam file in config folder with the one in repair folder note:- this method works only if hard drive is FAT32 formatted because NTFS drive does’nt take boot from Ms DOS This way you can remove the old administratOr password as if the windows is newly installed and the password was’nt set.
CrossOver Linux allows you to install many popular Windows productivity applications, plugins and games in Linux, without needing a Microsoft Operating System license. CrossOver includes an easy to use, single click interface, which makes installing a Windows application simple and fast. Once installed, your application integrate seamlessly with your Gnome or KDE environment. Just click and run your application, exactly as you would in Windows, but with the full freedom of Linux.
CrossOver Linux lets you use many Windows plugins directly from your Linux browser. Plugins work on any x86 based Linux distribution and will integrate with most browsers including Firefox 1.x, Netscape 6.x, Konqueror, Mozilla, and Opera. CrossOver also integrates with Gnome and KDE to let you transparently open any Word, Excel or PowerPoint file. But even better, you can open these attachment types directly from any mail client.
One Application: Two Delicious Flavors!
We’ve created two versions of CrossOver Linux — Standard and Professional — to serve our home-user/enthusiast and corporate markets even better. CrossOver Linux Standard provides individual users with the ability to run a wide variety of Windows software cleanly and economically. CrossOver Linux Professional provides corporate users with the enhanced deployability and manageability features their environments demand.
DriverMax - Free driver download program for Windows XP & Vista
I am shure that you've been in situations when you want to format your hard drive and reinstall Windows, but you're not sure you have all the hardware driver disks to get everything working again. I've been in situations when after a reinstalation of Windows, i had to spend a lot of hours in searching and downloading drivers, so belive me that's not interesting at all. Instead of searching for drivers over the internet or borrowing CD from friend, you can use simple and very effective tool called DriverMax. This tool allows you to download, backup and restore the drivers installed on your Windows Vista or Windows XP computer and check if newer versions are available. After reinstalling Windows you will have everything in one place. In this post i'll explain and show you how to use DriverMax.
Before the use of DriverMax you need to register. It's simple and totally free.
DriverMax Complete Features:
* Back up your drivers for fast and easy Windows re-installation * Download the latest driver updates from one place * Get detailed reports about the your computer’s components * Check for driver updates * Search and get accurate and detailed information when planning to buy new hardware * Share your computer’s hardware information with your friends.
Back up your drivers for fast and easy Windows re-installation
To backup your drivers to a folder , click on "Exports Drivers" under "Driver Operation" tab and after the re-installation is complete you can restore them from a single page rather than having to install each driver separately.
Download the latest driver updates from one place
If you want to find new drivers or display a detailed list of updates, just click on "Check for driversupdates", under "Update and Identification" tab and DriverMax will do the rest. Here you can also get detailed information about many devices installed in your computer and also identify unknown hardware installed in your pc based on an exact search in the DriverMax database.
DriverMax has a lot of interesting options like identify unknown hardware, find detailed hardware information, check best and popular hardware and etc. For sure it's very useful tool. Download DriverMax
The utility allows you to recover your CD key for Windows for the purposes of reinstalling / repairing your Windows setup.
In case you lost your CD key, this little portable utility can retrieve Keys information for windows. You can also call this serial number or registration information of windows.
Features:
This version will currently retrieve the CD keys for the following products
* Windows 2000,XP * Office 2007 beta * Office Professional 2003 * Front Page 2003 Download
Remove any malware from your computer with a single click.
NVT Malware Remover Tool is an application designed to detect and remove most of the Malware, Trojans, Keyloggers and other malicious threats from your computer. It includes also the ability to remove rogue software, Spyware and it allows you to do a complete system scan.
Features:
Accurate and Complete Disinfection Method
Save Report Log
Save infected files into "Infected" directory
Remove Rogue Software and Unwanted Applications
Remove Trojans, Spyware and Keyloggers
Remove more than 6000 malicious threads
Complete System Scan
Easy to use
Usage
The usage of NVT Malware Remover Tool is very easy: 1) Download and Install it 2) Update 3) Scan your Computer 4) To remove a detected file just click over the file with the right click of the mouse and select "Delete selected file".
NOTE: To avoid possible false positives you can submit detected files in online malware scanners before delete them.
If you are leaving your computer for a while and do not wish to turn it off, but want to assure that no-one else can use the computer while you are away, locking the desktop is the best option.
By pressing WINDOWSKEY+L, you password protect your system just as if you had logged out or restarted the computer. The advantage is that any programs or processes that were running when you locked the desktop will stay open and running in the background, ready for you to resume work or play.
Windows XP is like a big ocean of tips and tricks. In the coming days I will add more and more Windows XP tips, tricks and hacks to this article.
This registry edit will cause your system to reboot itself automatically upon crashing. This can be useful if you have a reason for keeping your system on 24/7:
Open REGEDIT
Navigate to 'HKEY_LOCAL_MACHINE\SYSTEM \CurrentControlSet\Control\CrashControl'
To change the name of the Recycle Bin desktop icon, click Start then goto Run, write Regedit and press Enter. It opens Registry Editor. Now in Registry Editor go to:
HKEY_CLASSES_ROOT/CLSID/{645FF040-5081-101B-9F08-00AA002F954E} and change the name "Recycle Bin" to whatever you want (don’t type any quotes).
Open registry editor by going to Start then Run and entering regedit. Once in registry, navigate to key
HKEY_LOCAL_MACHINE \ SOFTWARE \ Microsoft \ Windows \ CurrentVersion \ Explorer \ My Computer \ NameSpace \ DelegateFolders
You must see a sub-key named {59031a47-3f72-44a7-89c5-5595fe6b30ee}. If you delete this key, you have effectively removed the my shared documents folder.
Navigate to your desktop. On the desktop, right-click and go to New, then to Shortcut (in other words, create a new shortcut). You should now see a pop-up window instructing you to enter a command line path. Use this path in "Type Location of the Item" SHUTDOWN -s -t 01 If the C: drive is not your local hard drive, then replace "C" with the correct letter of the hard drive. Click the "Next" button. Name the shortcut and click the "Finish" button. Now whenever you want to shut down, just click on this shortcut and you’re done.
If you use your computer in an area where others may have access to it, and there are things on your system you would rather have kept confidential, locking your desktop when you leave the computer is an essential task. Here's a recipe for a desktop shortcut that will lock your computer in two easy clicks:
Right click on an empty area of the desktop and choose 'new' then 'shortcut.' The create shortcut wizard will open; in the first text box, type '%windir%\System32\rundll32.exe user32.dll,LockWorkStation' and then give your shortcut an appropriate name on the next page, and hit 'finish.'
You will notice that the shortcut you created has a blank icon. To select a more appropriate one, right click on the shortcut and hit 'properties.' In the 'shortcut' tab, click the 'change icon' button.
In the 'look for icons in this file' box, type '%SystemRoot%\system32\SHELL32.dll' then click 'ok' to see a range of icons for your new shortcut. Choose an appropriate icon. Your desktop locking shortcut is now ready for use. Test it out.
Windows XP includes the ability to perform different actions depending on the type of CD you insert into the drive. For example, you could set your system to always respond to CDs containing MP3 files by opening Windows Media Player.
To edit the Autoplay properties: Open 'my computer'. Right click on the drive you wish to set and select 'properties'. Choose the autoplay tab. Use the dropdown box to see the various recognized types of CD and choose appropriate actions for them.
This tweak removes the context menu that would normally appear when the user right clicks on the desktop or in the Explorer right results.
In this post i want to show you how to disable the right click functionality on desktop and explorer by using a simple registry hack. The bad thing is that people can still drag files and folders and drop them everywhere but it does provide some level of protection.
Lets start:
To use this feature, you will need to be logged into your computer with administrative rights.
1. Go to Start > Run > type REGEDIT and hit enter. Navigate to:
2. Here in right side panel, right click to create a new DWORD value with the name NoViewContextMenu (it is case sensitive), then assign number 1 in value data box.
Adding the registry tweak above will disable mouse right click for ALL users. If you only want to disable for the current logged in user, you should add the registry tweak to HKEY_CURRENT_USER instead of HKEY_LOCAL_MACHINE.