Showing posts with label mac. Show all posts

Operating Systems - the need for OS

The OS is the single most advanced and most efficient software that gets all the credit for making the computer hardware usable. The Operating System or OS is responsible for all the user friendliness of the computer.
Operating Systems is the first actual software that you need to install on your computers to be able to use it, including smartphones.
The functions of an OS include:
  • Memory management
  • Disk management
  • File management
  • Process management
  • Interrupts and Networking
The OS runs and makes it possible for the users to interact with the computer without any knowledge about the underlying hardware. The OS interacts with the hardware using firmwares and device drivers and the users can use the hardware using the interface of the OS, called the GUI or Graphical User Interface.
A few features of modern operating systems are:
  • GUI
  • Multi-Threading
  • Multi-Processing
  • Multi-Tasking
  • Multi-User
All other softwares that we use to do our work whether for office work, playing games, movies, music, browsing the internet, etc require the OS to support them. 

Examples of operating systems are Microsoft Windows XP, 7, 8, Mac OS X and Linux. A full list of operating systems may be found here

Mac Keyboard Shortcuts for Google Chrome


Tab and window shortcuts

⌘-N Opens a new window.
⌘-T Opens a new tab.
⌘-Shift-N Opens a new window in incognito mode.
⌘-B Toggles the bookmarks bar on and off.
Press ⌘-O, then select file. Opens a file from your computer in Google Chrome.
Press and click a link. Or click a link with your middle mouse button (or mousewheel). Opens the link in a new tab in the background .
Press ⌘-Shift and click a link. Or press Shift and click a link with your middle mouse button (or mousewheel). Opens the link in a new tab and switches to the newly opened tab.
Press Shift and click a link. Opens the link in a new window.
⌘-Shift-T Reopens the last tab you've closed. Google Chrome remembers the last 10 tabs you've closed.
Drag a tab out of the tab strip. Opens the tab in a new window.
Drag a tab out of the tab strip and into an existing window. Opens the tab in the existing window.
Ctrl-Tab Switches to the next tab.
Ctrl-Shift-Tab Switches to the previous tab.
⌘-Q Closes Google Chrome.
⌘-W Closes the current tab or pop-up.
Click and hold either the Back or Forward arrow in the browser toolbar. Displays your browsing history in the tab.
Delete Goes to the previous page in your browsing history for the tab.
Shift-Delete Goes to the next page in your browsing history for the tab.
Press Shift while clicking the + button in the top left corner of the window. Maximizes the window.
Double-click the blank area on the tab strip. Minimizes the window.
⌘-Shift-Option-V Pastes content with the formatting of surrounding text.

*_*_*_*_*_*_*_*_*_*_*_*_*_*_*_*_*_*_*_*_*_*_*_*_*_*_*_*_*_*_*_*_*_*_*_*_*_*_*_*_*_*

Address bar shortcuts

Use the following shortcuts in the address bar:
Type a search term, then press Enter. Performs a search using your default search engine.
Type a search engine keyword, press Space, type a search term, and press Enter. Performs a search using the search engine associated with the keyword.
Begin typing a search engine URL, press Tab when prompted, type a search term, and press Enter. Performs a search using the search engine associated with the URL.
Ctrl+Enter Adds www. and .com to your input in the address bar and open the resulting URL.
Type a URL, then press ⌘-Enter. Opens the URL in a new background tab.
⌘-L Highlights the URL.
⌘-Option-F Places a '?' in the address bar. Type a search term after the question mark to perform a search using your default search engine.
Press Option and the left arrow together. Moves your cursor to the preceding key term in the address bar
Press Option and the right arrow together. Moves your cursor to the next key term in the address bar
Press Shift-Option and the left arrow together. Highlights the preceding key term in the address bar
Press Shift-Option and the right arrow together. Highlights the next key term in the address bar
⌘-Delete Deletes the key term that precedes your cursor in the address bar
Press Page Up or Page Down in the addess bar menu. Selects the previous or next entry in the menu.

*_*_*_*_*_*_*_*_*_*_*_*_*_*_*_*_*_*_*_*_*_*_*_*_*_*_*_*_*_*_*_*_*_*_*_*_*_*_*_*_*_*

Webpage shortcuts

⌘-P Prints your current page.
⌘-S Saves your current page.
⌘-R Reloads your current page.
⌘-F Opens the find bar.
⌘-G Finds the next match for your input in the find bar.
⌘-Shift-G or Shift-Enter Finds the previous match for your input in the find bar.
Press Option and click a link. Downloads the target of the link.
Drag a link to bookmarks bar Bookmarks the link.
⌘-D Bookmarks your current webpage.
⌘-Shift-F Opens your page in full-screen mode. Press the shortcut again to exit full-screen.
Space bar Scrolls down the web page.

*_*_*_*_*_*_*_*_*_*_*_*_*_*_*_*_*_*_*_*_*_*_*_*_*_*_*_*_*_*_*_*_*_*_*_*_*_*_*_*_*_*

Text shortcuts

⌘-C Copies highlighted content to the clipboard.
⌘-V Pastes content from the clipboard.
⌘-X or Shift-Delete Deletes the highlighted content and copies it to the clipboard.


Windows Keyboard Shortcuts for Google Chrome

Linux Keyboard Shortcuts for Google Chrome

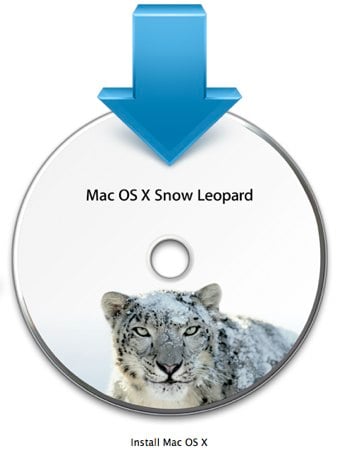
How to Enable Folder Previews In Snow Leopard 4?

This is a very simple little trick which you can enable in Snow Leopard. In essence it provides a thumbnail preview of the contents of any folder. This is quite useful for quickly looking inside a folder. All it involves is a simple Terminal line.

The first step is to disable any Quicklook plugins you may have installed. For example you may have installed the Folder Viewer. This is found in /Library/Quicklook . Simply delete the .qlgenerator file or move it out of the folder. This will remove the plugin from the Quicklook program. The next step is to apply the Terminal code.quicklook folder previews

Open up Terminal, located in Applications > Utilities. Copy and Paste (or type) the following.

defaults write com.apple.finder QLEnableXRayFolders 1;
killall Finder;

This will apply the code to enable previews and restart Finder for the changes to take effect. Its not that useful, however if you don’t have a plugin it can be an added bonus. Since it runs using Quicklook any file preview will be rendered.

Its fun to enable, however I recommend installing the Folder Viewer as mentioned in the begging of this post.

How to Enable Remote Disc (Drive Sharing) On Any Mac?

How to Enable Remote Disc (Drive Sharing) On Any Mac?

If your Superdrive or disk drive is on the way out (I think mine is) it can be a real pain to change it, especially if its locked inside a MacBook or MacBook Pro. I personally use my disk drive about twice a year. So when the time comes to get something off a CD it can be a major pain to get something off a CD. However there is a solution to this problem. If you take a look at a MacBook Air, Drive Sharing is available, so all the background code is ready to go, we just need to bring it to life. This post is going to cover the entire method of getting drive sharing to work. If you just want the hack, go to the end of the post.

To enable drive sharing, first go to the computer which will host your DVD. If it is a Mac, you can enable DVD sharing. Go to System Preferences > Sharing and check “DVD or CD Sharing”. If you are on a Windows machine (I feel sorry for you), download this package and install it. Under Control Panel open up “DVD and CD Sharing” and check the box which asks if you want to enable Disc Sharing. The host computer is now set up. To save you some time, you can now insert the DVD you want to share.

Here comes the hack. On a MacBook Air this little preference code is already enabled. On other Macs this isn’t the case. Open up Terminal and type the following two lines, press return after each one. There will be no confirmation from Terminal when you have finished. From MacRumors.

defaults write com.apple.NetworkBrowser EnableODiskBrowsing -bool true
defaults write com.apple.NetworkBrowser ODSSupported -bool true

Restart you Mac, when you open Finder again you should see “Remote Disk” in the sidebar (make sure its enabled in Preferences). You can now navigate to the drive as if it was on your own computer. Loading the files takes slightly longer since it has to run over your network. I remember reading somewhere that this wont work over secured Wi-Fi connections, so you have to use a cable for best results.

Remote Disk

The Remote Disc option acts like a folder, each drive that is shared will appear as its own entry under “Remote Disk”. This means that you can set up this feature on other Mac’s and share the drives over the network. I personally think this type of trick will be pretty cool if you are in an office environment and constantly handing disks over to each other. If you are really adventurous and have a Mac with lots of USB ports or internal slots (i.e a MacPro) you could make a CD server with lots of disk drives and share each one of them, so every one over a network can access them. However, if it has come to that it may be worth ripping the disk to a disk image and making a ISO server. Fun idea anyway.


How to disable ads in safari browser?

Disable Ads In Safari

Sorry for the lack of posts over the last couple of days, University has got really busy and I had no free time at all to do any post. The weekend however has arrived and I have some free time to do some work. Todays post will be about blocking adverts on websites while using Safari. I find that adverts on web pages are getting more an more annoying and some, inevitably, need to be removed from view.

This plugin for Safari is very similar to one for Firefox, called Adblock Plus. They are both designed to block adverts from view. These can include those really annoying half page ones that pop up, or adverts that make no sense and you don’t want to see. Its also very useful if you run on a limited connection and want to save the bandwidth. Some, especially Flash, adverts take up a lot of bandwidth and you may want to remove them.

To install Safar Adblock, head over to this website. Here you can download and install the plugin. You do need Mac OS X 10.5+ and if you are a Snow Leopard user you have to run Safari in 32-bit mode for the plugin to work. Its a useful little plugin which enables your web surfing to be clutter free.

How to Editing Startup Items On Your Mac?

How to Editing Startup Items On Your Mac?
This trick is going to show you how you can modify your start up items. When you Mac boots it will first run the Start Up Items folder, then produce the login screen, finally it would log in and run any login items. There is a slight difference in the two folders (Start Up and Login), as a result you can have different effects.
To find your Start Up Items folder, go to Macintosh HD > Library > StartupItems depending on what you have installed there can be any where between zero entries and a whole leap of folders. Here you can dissect what is going on. If you have an application that misbehaves on bootup, it can be a good bet to move it out of the folder. Anything in this folder will run just after boot, so if you have boot problems, the offending code will probably be in this folder.
I haven’t tested this trick, however, if you want applications to run at boot, place them in a folder within the Startup Items, restart you computer and see of the application runs. This can be useful for running your Mac in kiosk mode or making an application run before you have to log in (such as monitoring apps). Have a play around and see what happens. If anything breaks move it out of the folder and try again.
I have a had a look around for various different resources on the StartupItems folder. At the moment it seems to be trial and error if anything works.

Different Bootable Operating Systems On Your Mac

Different Bootable Operating Systems On Your Mac
Today we have a guest post by Chris Wanja. He wanted to do a post on creating different bootable disks which you can use on an external hard drive. For example a Leopard Boot and a Snow Leopard Boot. This means you have two different operating systems which you can use and allows you to try things out in different operating systems. This method is slightly different to the bootable backups I did a couple of days ago. The method is quite complicated so you have to follow the instructions quite carefully. I recommend people who know what they are doing attempt this tutorial as you can easily lose all of your data. If you have any questions please leave a comment below or Twitter.
“In the post we cover how to create bootable, clean operating systems as well as bootable installers. Some plus sides to creating a bootable drive is the ability to defragment your own hard-drive. Defragging simply moves broken up sectors on your hard-drive back inline so they are side-by-side. This increases the response of your operating system when you request a file. To read more on defragmentation, check out this Wikipedia article. On a Windows machine, they include the ability to defragment right from inside the operating system. On the Mac, you have to purchase a software CD such as Drive Genius and then boot into that CD. With a bootable operating system, you can load via that and defragment right from there. It is a lot faster over FireWire or USB than a bootable CD. Creating a bootable operating system installer makes things so much faster than installing off a retail copy or grey discs included with your Mac. The latter part of this post will show you how to great a bootable operating system while this next section will show you how to create an installer partition.
Go ahead and plug in and turn on your hard-drive. Insert the retail copy of Tiger, Leopard, Snow Leopard or which OS you would like. Let it mount on your desktop. As soon as it mounts, fire up Disk Utility found in your ~/Applications/Utilities folder. In Disk Utility you are welcomed with a screen that has your local hard-drive and your optical drive. For users on 10.3 or lower, Disk Utility will not mount your optical drive. At this point, you will see your internal hard-drive, CD drive and any external hard-drives connected. Choose the main hard-drive (the brand name) on the left hand side. Across the center, choose the partition tab and create two (2) partitions for every operating system you would like to install; one for the installer and one for the clean boot. Use all of the sizes below to make sure you have enough space partitioned:
  • Snow Leopard:


    • Install: 12GB
    • Operating System: 15GB
  • Leopard


    • Install: 15GB
    • Operating System: 20GB
You are now ready to move on to imaging the CD to the Installer partition. Read on!
The picture below shows five (5) different partitions. On a small 500GB disk I have my TimeMachine, 10.5.6 Installer, 10.5.6+ OS, 10.6 Installer and the 10.6 OS. Choose the partition you want to send the installer too. Notice the buttons across the middle box change when you select a specific partition. Go to the “Restore” button. Feel free to read the text at the top, but our focus will be on the input spaces in the lower half of the box. The first box is for your source (the install CD) and below that is for the hard-drive partition you want it to install to.
Different Bootable Operating Systems On Your Mac
NOTE: obviously, names of partitions will be different so the Destination box will be different from user to user. Click the “Restore” button, input your password and off it will go. Let the Disk Utility do its thing and about forty-five minutes to a you will be done. By default, your partition will be renamed “Mac OS X Install”; go ahead and rename it for reference later on. I choose the OS version – IE: 10.5.6 Install or 10.6 Install.
Next up is installing a clean operating system on an empty partitioned hard-drive. We just created an faster way to install the operating system, so lets go ahead and use that. Make sure there is an empty partition waiting for your OS install. If not, go back into Disk Utility and create a partition (as described above). Shut down your computer (or restart) and as soon as you see the grey screen hold down the option/alt key – ⌥. This should bring you to the screen show you all bootable drives. You will see your internal drive (Macintosh HD or what you have it named as) and then you will see the partition with the installer you just created. There should be only two drives, so you should not be to confused, try doing it with five different bootable OS and installers. Choose the installer partition and you will be booted into it just as if you were doing it off the CD. Follow the prompts just like you would to re-install. The only difference is when you come to the screen that allows you choose the hard-drive, make sure you choose that empty partition. DO NOT CHOOSE YOUR INTERNAL HARD-DRIVE – it should have a yellow triangle on it. Consider that a big red stop sign and choose the other. Finish the installer and it will reboot. When it reboots it is scripted to go to that operating system it just installed. So make sure you hold down the option / alt key to choose your internal hard-drive (unless you want to go into the new operating system you just created).
You have successfully created a FireWire or USB installer and bootable operating system. There is a couple of different ways of access these new jewels of yours.
  • Easiest: restarting and holding down the option / alt key. Then choose the partition you want to access.
  • Pain in the neck: Open System Preferences, go to Startup Disk, unlock, and choose the external drive. The reason I call this the pain in the neck method is for two reasons:


    • On turn on, the OS will constantly look for that external partition. When it doesn’t find it (because it is not always plugged in) it will default to your internal hard-drive. This adds about ten seconds to the boot time.
    • If the drive is plugged in, it will always default to that (until you change it). Making it a pain if you forget”
You should now have more than one different operating system available to you which you can use as necessary. I hope you followed this tutorial and now have two operating systems on your hard drive.

Wireless Keyboard lost ?

Wireless Keyboard lost

My MacBook Air has problems finding my wireless keyboard. It is paired, but not seen. I have to go through the whole rigmarole of adding a new device to make it visible. Why?

Sometimes Bluetooth preferences lets me connect; sometimes not.

My Keyboard isn't a favourite! Solving this should be easy—just use Bluetooth panel in System Preferences.

There's an obvious button to press in Tiger; but on Leopard it's hidden.

Solution

Open Bluetooth Preferences ...

Select your device (Keyboard or whatever).

For an immediate fix select Connect from the settings menu.

For something longer-lasting, select Show More Info

The trick: From the settings menu (which has now changed) select Add to Favorites. You're done.

Sometimes it shows connected but still no keystrokes appear: Disconnect and then Connect using the settings menu.

MacBook Air freeze: reset SMC

MacBook Air freeze: reset SMC

Daily, I take my MBA to work, and connect it to my 30" cinema display. At the end of the day I disconnect and take it home. Once back home, I plug into the 24" LED display and keep on working. The MBA sleeps while I'm cycling to and fro — and wakes up when I plug it in.

Today, I got home, plugged in, and found a blank screen. I waited; nothing happened. I waited some more. Eventually I gave up waiting and did a forced shut-down, by pressing and holding the power button.

To restart, I pressed the power button. The chimes, and the apple came up just as usual; then the little wheel thing came up, but it didn't move. I waited — nothing. I plugged in, unplugged, opened. closed, shut-down (again) etc. I tried all of this again, and again, in various permutations, and with plenty of waiting — nothing. Frozen as a dead parrot!

So, I reset the System Management Controller — that worked :-)

To reset the SMC: Shutdown; plug in to mains power; hold down shift-ctrl-alt (alt is aka option) on the left side of the keyboard, and press the power key once; then release the keys, wait 5 seconds, and press the power key to restart. Effective magic!

The SMC includes the Power Management Unit (PMU) you may be familiar with from other devices.